
Installation guide
Fitting SavvyTanks V2
SavvyTanks V2 is no longer sold, but plenty are still out there working perfectly well. This is the guide for fitting and setting one up - and the wiring genuinely differs from V3, so use this page rather than that one.
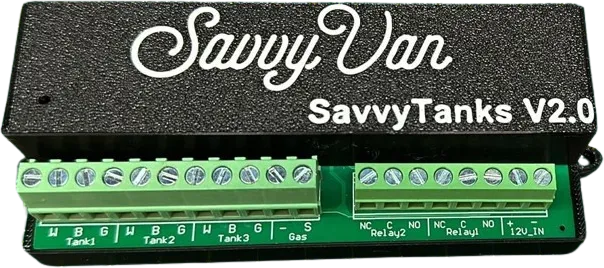
At a glance
- Water tanks
- Up to 3 - fresh, grey and black
- Water probes
- CBE PC200, wired + / − / S
- Gas
- Any 0–90 or 0–95 ohm sender, either way round
- Gas solenoid
- Through a relay - there is no built-in driver on V2
- Pairs as
- SavvyTanks
- Size
- 87 × 72 × 35 mm, drawing 0.04A at 12V
Powering it
A 12V, 1A fused supply into the connectors marked 12v_IN +/−.
Water probes
Works with CBE PC200 probes, ours or anyone else’s. Remove the white connector from the sender and extend the cable if the run needs it.

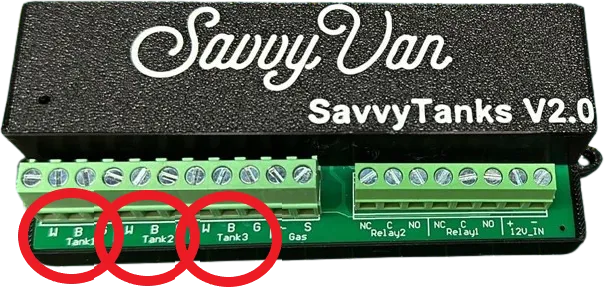
The terminals are marked Tanks 1 to 3, and any probe can go on any of them. The default is fresh on 1, grey on 2 and black on 3 - changeable on the panel.
Wire by colour - note these markings differ from V3:
- White (W) → +
- Brown (B) → −
- Green (G) → S
Gas level
Any 0–90 or 0–95 ohm sender. The wiring is not polarity sensitive, so the two wires from the sender go onto the GAS terminals either way round.
Gas solenoid and drain valve
V2 has no onboard driver - a solenoid or a drain valve runs through one of the two relays instead. (This is the main thing V3 changed: it drives a solenoid directly.)
Each relay has three connections:
- NO - normally open. Off by default; the panel switches it on.
- COM - common. Connect to ground.
- NC - normally closed. On by default; the panel switches it off.
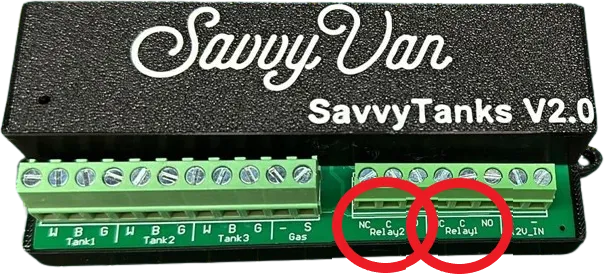

To wire a solenoid or a valve: connect its live wire to your 12V feed as its manufacturer specifies, then run its negative into NO (or NC), with your ground on COM.
Pairing it
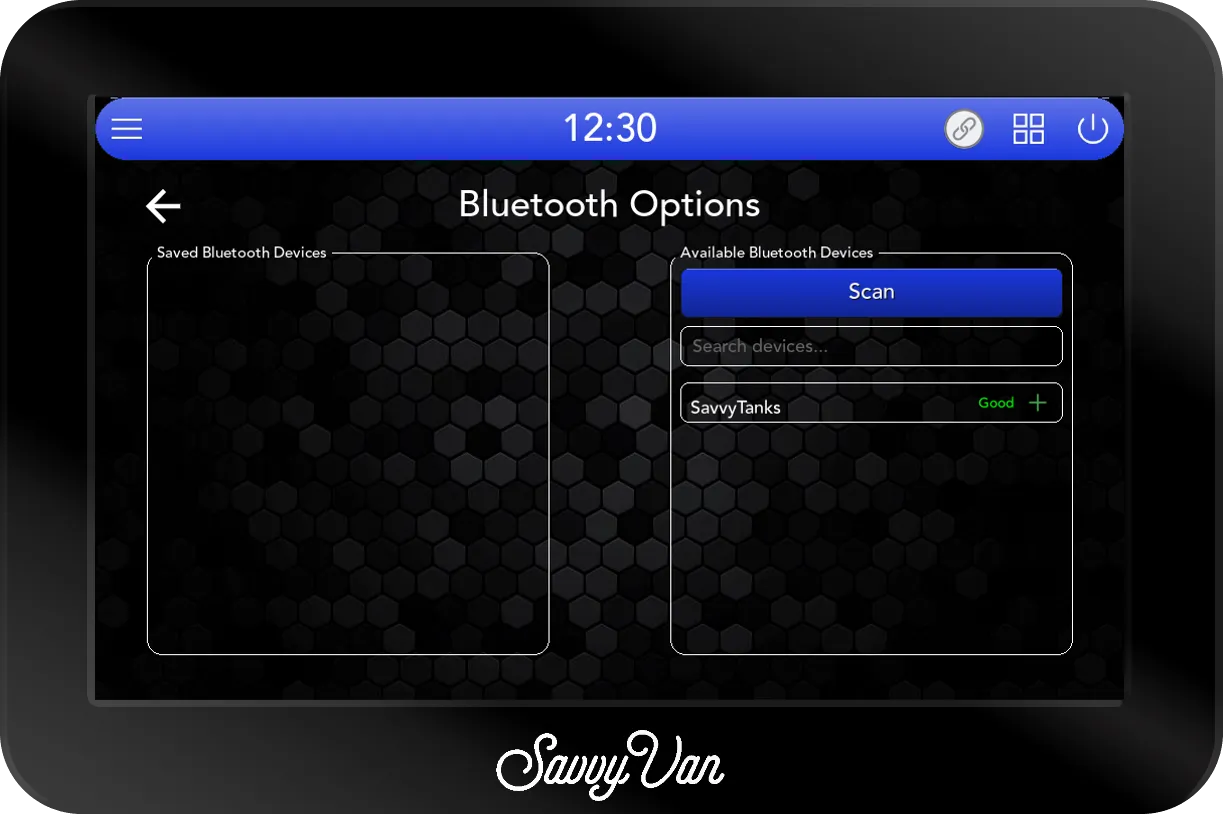
- On the panel, open Installer Settings, enter the passcode, and go to the device pairing screen - the one with Scan on the right.
- Wait for
SavvyTanksto appear under available devices. The list fills in by itself a few seconds after the page opens; tap Scan if it is slow to show. - Tap the green + next to
SavvyTanks. It appears in the saved list on the left.
Setting up your tanks
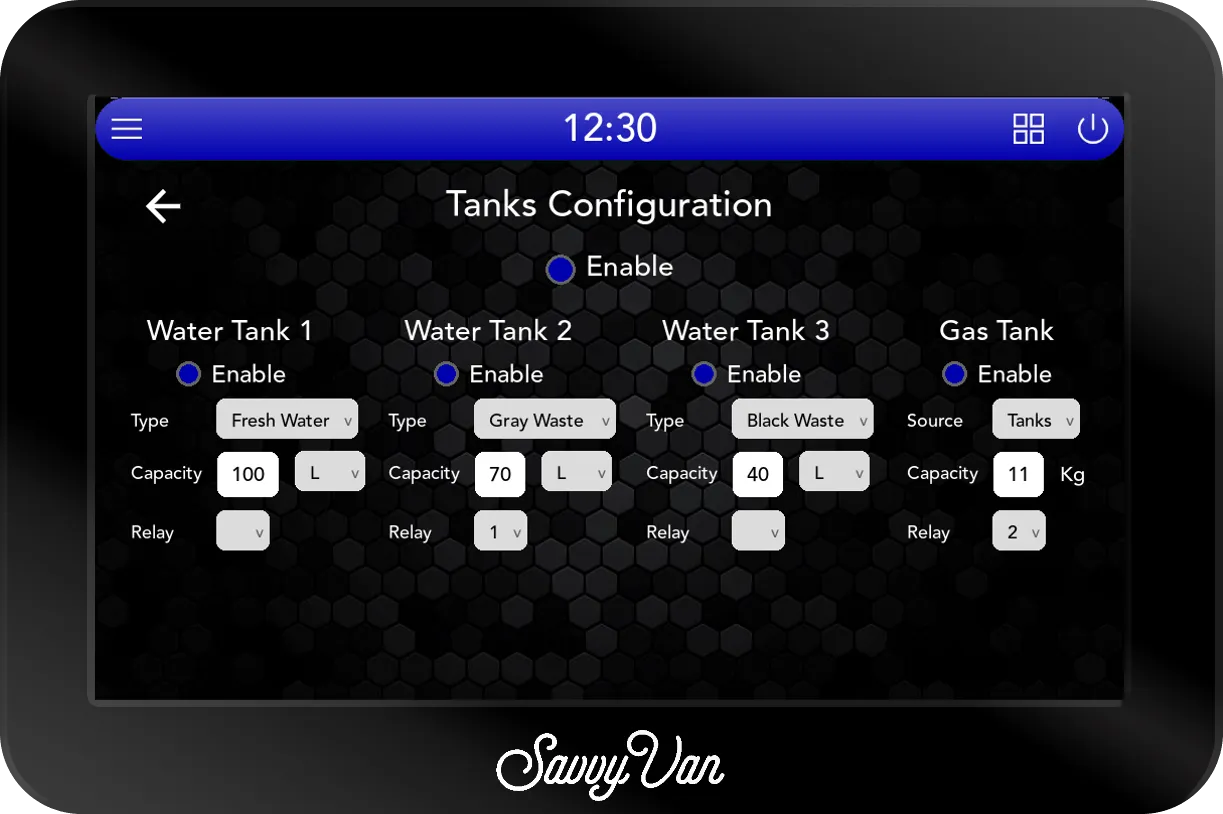
Back in Settings, open Tanks Settings and enable SavvyTanks. On a Sargent, CBE or BCA version of the panel that is a dropdown rather than a switch - choose SavvyTanks from it.
Each tank has its own Enable switch. Turn on each one you connected, and set:
- Type, on a water tank - fresh, grey or black.
- Source, on the gas tank - which module reads the gas level. Tanks is SavvyTanks. If a Propex heater module is paired as well, Propex is offered too: choose whichever one your gas sender is wired to.
- Capacity - so the screen can show litres as well as a percentage. Water tanks are in litres or gallons, the gas tank in kg.
- Relay - if you wired one. Selecting it here is what makes tapping that tank on screen activate the valve or solenoid.
Using it
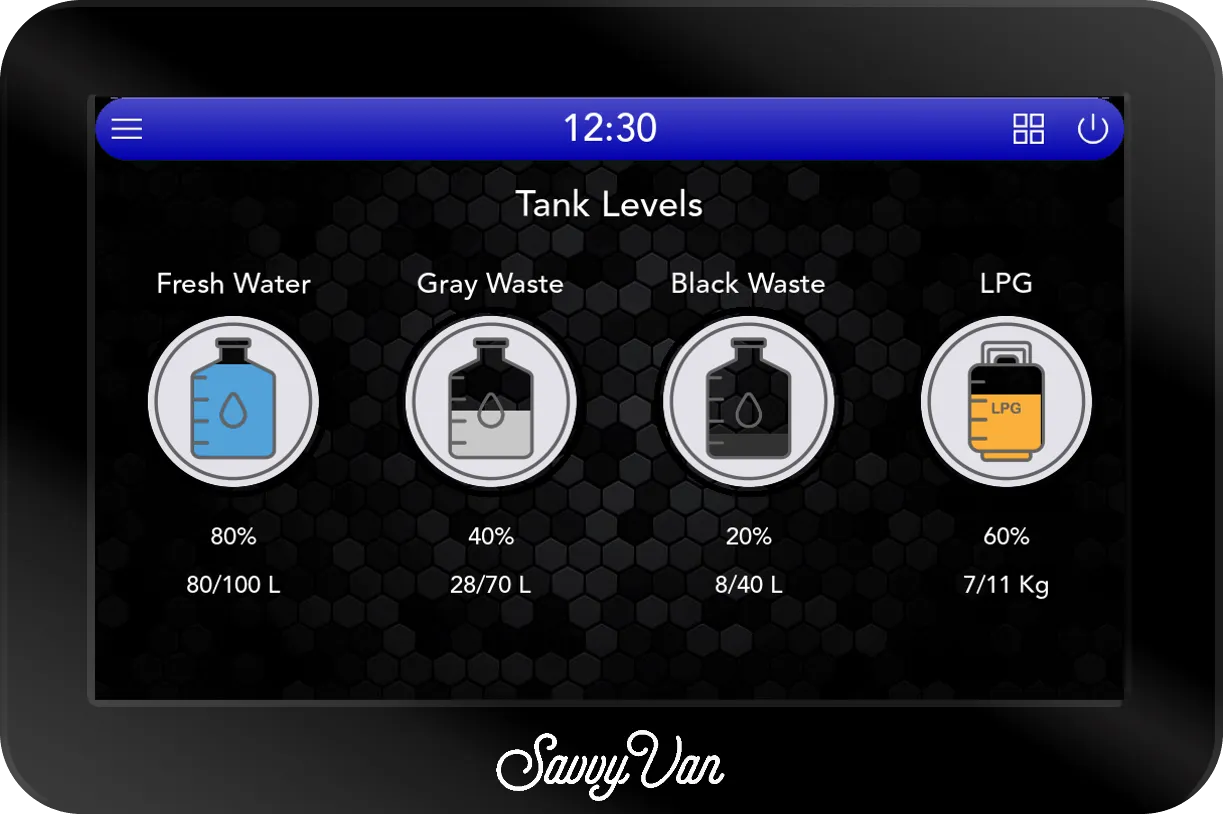
Tank levels appear on the main screen, taking turns every 5 seconds when more than one is configured. A red ring means that tank’s relay is active. Tap the tank icon for the full page.
Troubleshooting
Nothing in the list when you scan? Check the module’s 12V supply first.
Specification
| Working voltage | 7–30V |
| Draw | 0.04A at 12V |
| Dimensions | 87 × 72 × 35 mm |
| Water tanks | Up to 3 |
| Relays | 2 |
If you are thinking about upgrading
SavvyTanks V3 added an onboard Ultra Low Current Driver - so it opens and holds a gas solenoid without using up a relay - plus better performance and reliability. It needs a SavvyVan3 panel and will not pair with a SavvyVan Lite.
Questions people ask
- Can I still buy one?
- No - V2 has been replaced by V3. If yours has failed, V3 does the same job with an onboard driver for gas solenoids and better reliability.
- Are the probes the same as V3's?
- The probes are the same CBE PC200 type, but the terminal markings differ: V2 is + / − / S, V3 is W / B / G. Wire to the markings on the module in front of you.