
Installation guide
Fitting the Autoterm add-on
The Autoterm add-on brings a 2D or 4D heater onto the SavvyVan3 screen. One cable comes out of the controller already in your van and goes into the add-on - nothing is cut, nothing new is run, and the heater itself stays exactly where it is.
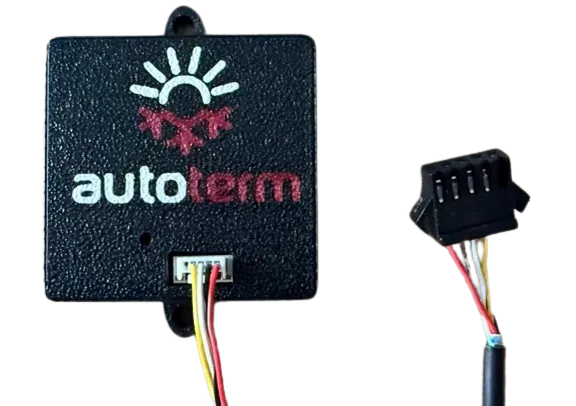
At a glance
- Replaces
- The Autoterm controller
- Works with
- Autoterm 2D and 4D heaters
- Cabling
- One cable, moved across from the existing controller
- Adds
- Auto Heat, a week of schedule, timers and named faults
- Connection
- Wireless to the panel
- Pairs as
- AutotermV1
- Fitting
- About an hour, no heater work
Before you start
Update the panel first. Heater support improves with releases, and a panel a few versions behind may not offer Autoterm at all. Update instructions are in the SavvyVan3 user guide.
Then turn the heater off at its isolator and give it a few minutes. You will not touch the heater itself, but there is no reason for it to run while you unplug its controller.
Moving the cable across
This is the whole wiring job.
- Take out the existing Autoterm controller. It is usually a round dial or a small panel in the living area. Ease it out of its opening carefully - the cable behind it is the one you are about to reuse.
- Unplug the cable from the back of it. One connector, and it only goes in one way.
- Plug that same cable into the add-on. It carries power and heater control together, so there is nothing else to connect.
That is it. No new cable, nothing to cut, no separate 12V feed to find - the connection you just moved already carries everything the module needs.
Siting the module
The add-on talks to the panel wirelessly, so it does not have to live near it. It does have to live somewhere sensible:
- Dry and protected. A locker or behind trim is ideal. Not a wheel arch, and not anywhere it will get wet.
- Within range, and preferably not with a sheet of steel between it and the screen.
- Reachable again, so you are not taking a cupboard apart the first time it needs looking at.
Secure it so it cannot rattle about. There are lugs on the case for a screw or a cable tie.
What the light is telling you
One LED on the module tells you where you are - check it before you go near the panel.
| The light | What it means |
|---|---|
| Solid green | Powered up and booting. Allow 60 to 90 seconds - the Autoterm module is slower to start than the others, and people mistake it for dead |
| Flashing blue | Booted, and waiting to pair |
| Solid blue | Paired to your panel. Nothing more to do |
| Red | Something is wrong - see troubleshooting |
| Nothing at all | No power reaching it - see troubleshooting |
Pairing it
Same as every other SavvyVan add-on.
- On the panel, open Installer Settings, enter the passcode, and go to the device pairing screen - the one with Scan on the right.
- Tap Scan and give it a few seconds to look around.
- Tap the green + next to
AutotermV1. That is the add-on. It moves across into the saved list on the left. - Wait for the symbol to turn blue. That is the panel telling you it is connected.
Setting it up
Back in Installer Settings, tap Heater Settings and check the model reads Autoterm - pairing sets it for you. Leave Enable Auto Heat Mode ticked: it is what puts Auto Heat on the heating page.
Then give the heater a temperature to work to. In Additional Settings, set one of the panel’s temperature sensors to Inside - the installation guide shows the page. This step is not optional. The Autoterm’s own sensor sits in its air intake and reads the heater rather than the van, so the panel does not use it. With no sensor set to Inside, the heating page cannot show the van’s temperature and Auto Heat will not run.
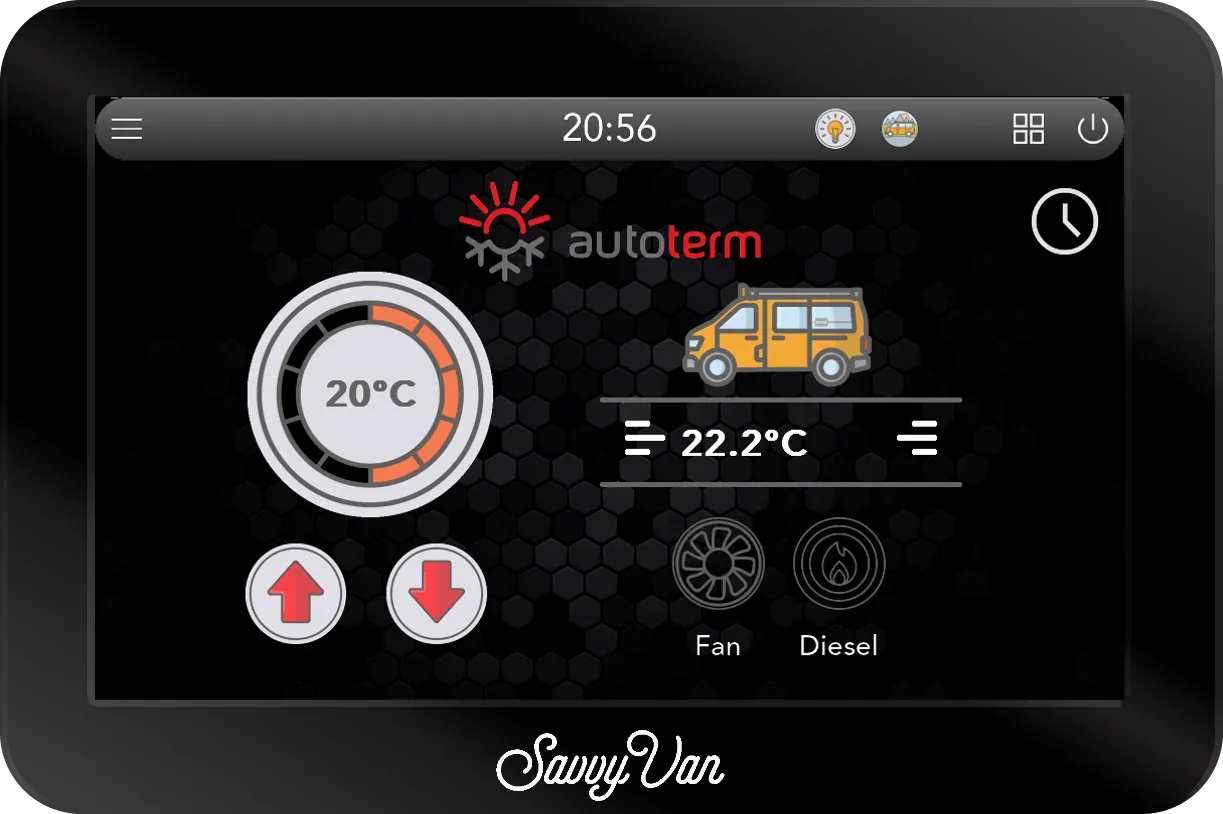
Head back to the main page. The heater now sits on the right of the screen with your target temperature on it - tap it for the full heating page.
Using it
Auto Heat is the reason to fit this rather than keep the original controller. Choose the temperature you want and the panel manages the output to reach it and hold it, easing off as the van warms - instead of picking a setting and living with whatever it gives you.
Alongside it:
- A week of schedule. Warm for getting up, warm again for coming back off a walk.
- A timer, for an hour of heat that turns itself off.
- Faults in words. If the heater reports a problem, the screen names it instead of leaving you to count flashes against a manual.
Troubleshooting
No light is a supply problem, not a pairing one. Check the fuse and the feed before you rescan - it is the commonest reason a module never appears.
A red light means the module cannot do its job. Power it down, check the wiring against this guide, and power it back up. Still red? Tell us rather than working around it, and send the log files from the passcode screen.
Warranty
The Autoterm add-on carries our 12-month warranty. The free second year you get for registering is for the SavvyVan3 panel itself, so there is nothing to register for this one.
Questions people ask
- Does my heater have to be a particular Autoterm model?
- It works with the Autoterm 2D and 4D. If yours is something else, ask us before ordering - send a photograph of the unit or its controller and we will tell you either way.
- Can I put the original controller back?
- Yes. It uses the same cable, so swapping back is a five-minute job if you ever need it - when you sell the van, for instance.
- Does this replace my heater?
- No. It replaces the controller only. The heater stays where it is and keeps doing what it always did.
- What is Auto Heat?
- A mode the original controller has not got. Rather than running at one fixed setting, the panel manages the heater to reach the temperature you asked for and hold it, easing off as the van warms up.