
Integration guide
Switching a Victron MultiPlus-II from the panel
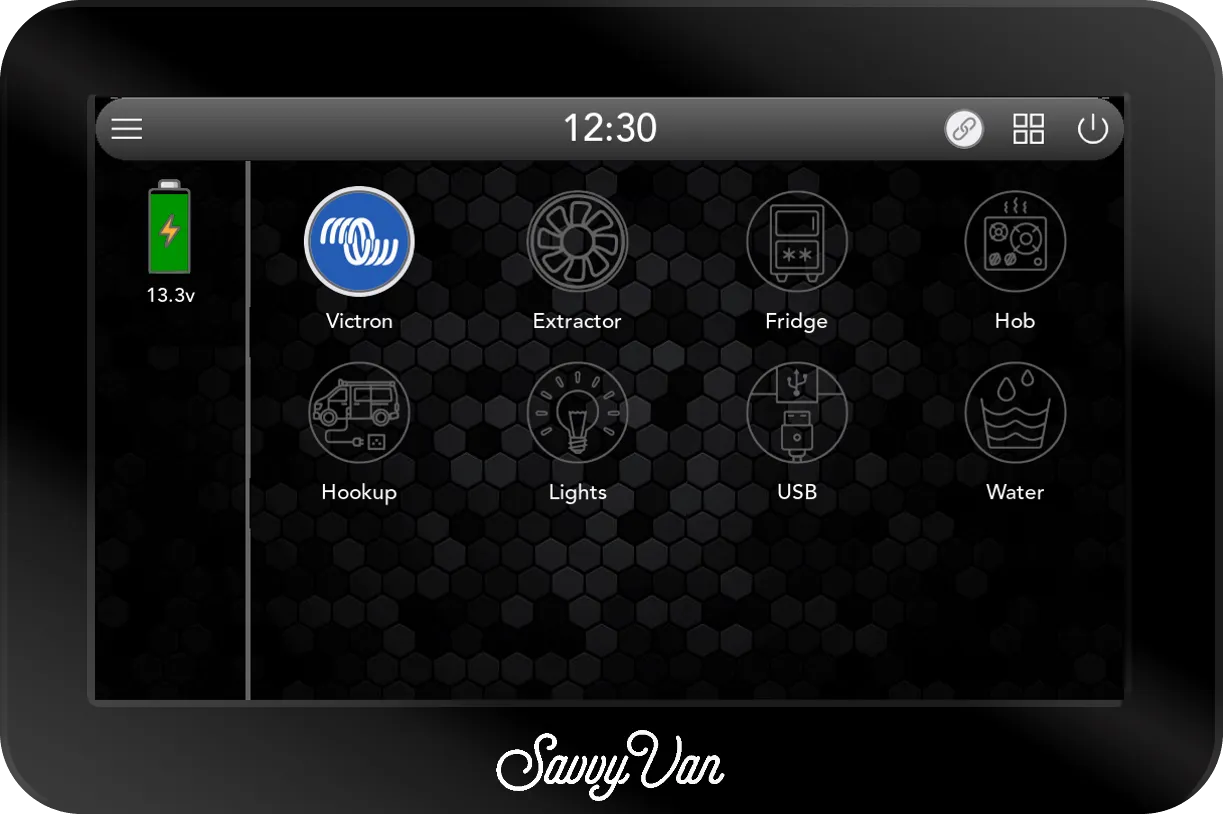
A Victron MultiPlus-II has a Remote On/Off connector made for exactly this. Take out the little wire link, run two wires to one of the panel's eight switches, and your inverter/charger turns on and off from a tile on the main screen - with the Victron logo on it, if you like. No relay, no fuse, and nothing to buy.
At a glance
- Works with
- A Victron MultiPlus-II, through its Remote On/Off connector
- Connects to
- COM and NO on any free switch
- You need
- Two wires. No relay, no fuse and nothing to buy
- What it does
- Turns the whole MultiPlus-II on and off - inverter and charger
- The icon
- Victron, on the second page of tile icons
- What it does not do
- Read the MultiPlus-II. No watts or charge state on the panel
What this gets you
The inverter on the same screen as everything else. Tap the tile and the MultiPlus-II comes on; tap it again and it goes off. You no longer have to dig it out from under a seat to find its switch, and it is easy to see at a glance whether you left it running.
It works through a connector Victron built for the job. The MultiPlus-II has a Remote On/Off input, which comes with a short wire link across it so the unit runs. Take the link out and put one of the panel’s switches in its place, and the switch does what the link did - only now you can open it.
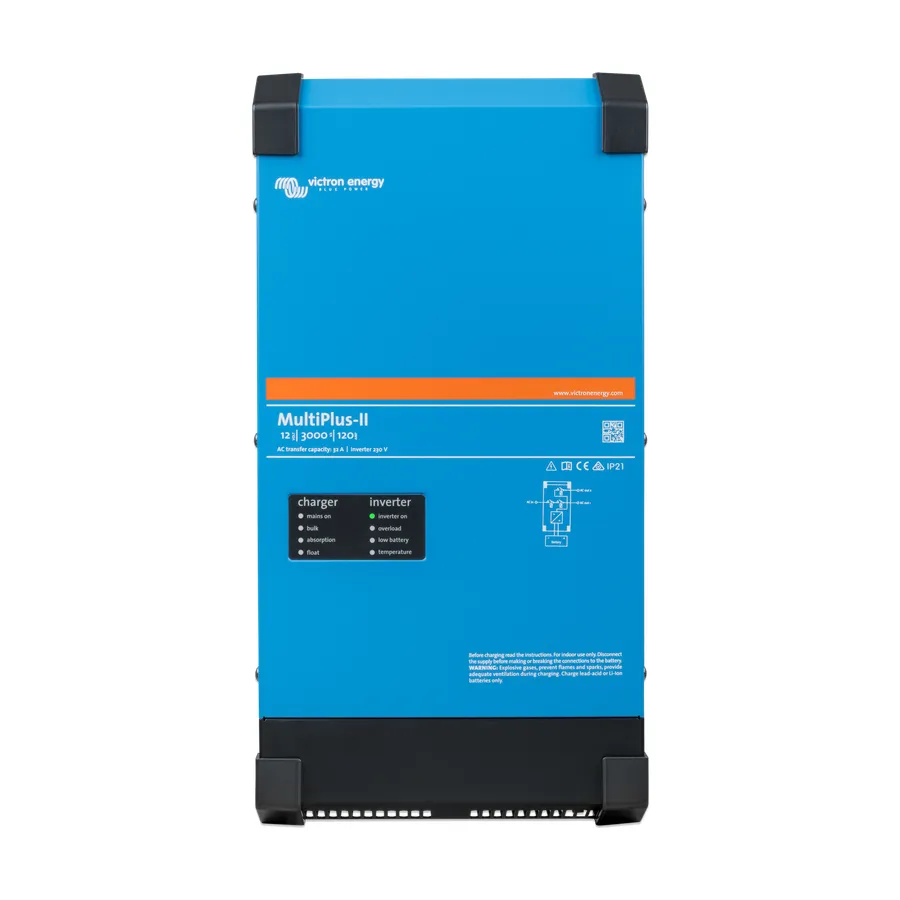
What it does not do: the panel does not read the MultiPlus-II. It turns it on and off, and that is all - so there are no watts, no charge state and no faults on the screen. The MultiPlus-II’s own lights still show what it is doing.
What you will need
- A Victron MultiPlus-II. The photographs here are of a 3000VA unit, and the 5000VA is laid out the same way. On other sizes the Remote On/Off plug can sit somewhere else in the connection area, and Victron’s manual for your model shows where.
- A free switch on your SavvyVan3. On the standard panel that is any of the eight. On a Sargent or BCA version use 5 to 8, and on a CBE version 4 to 8 - the others already run the van’s own circuits.
- Two wires, long enough to reach from the MultiPlus-II to the panel’s control board. Nothing heavy: no power flows along them.
- A small flat screwdriver.
Finding the Remote On/Off connector
Switch the MultiPlus-II off at its own switch, disconnect the hook-up and any other mains supply, and isolate the battery before you take the front cover off. The mains terminals are right beside the connector you want.
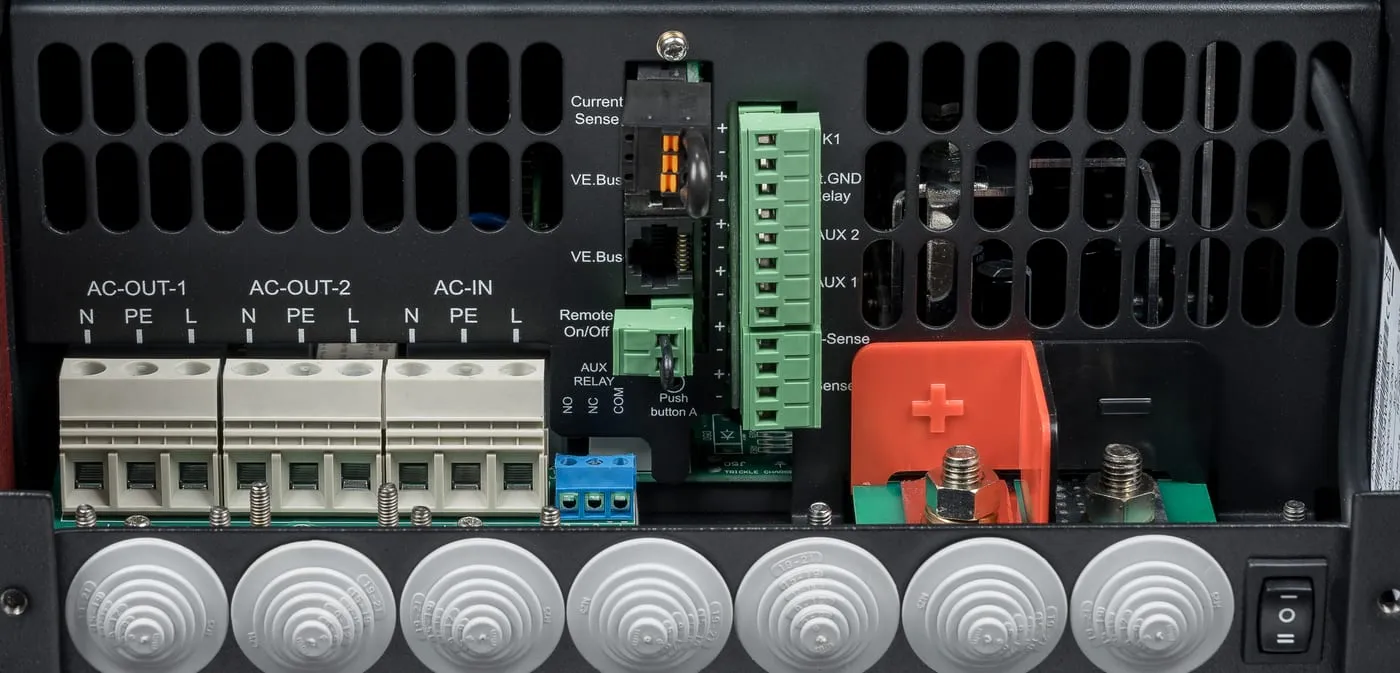
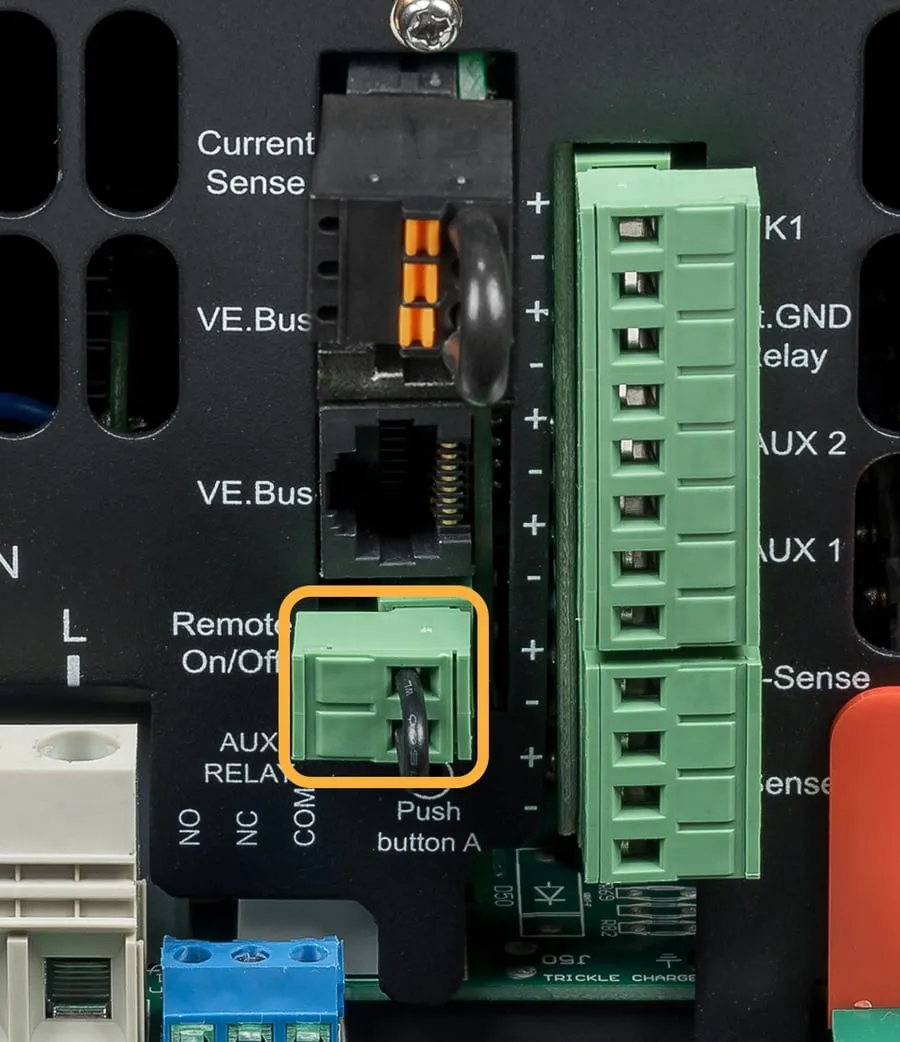
Under the cover, along the bottom, are the AC terminals on the left, the battery terminals on the right, and a column of small connectors in the middle. The one you want is the green two-way plug marked Remote On/Off, just below the two VE.Bus network sockets.
Wiring it
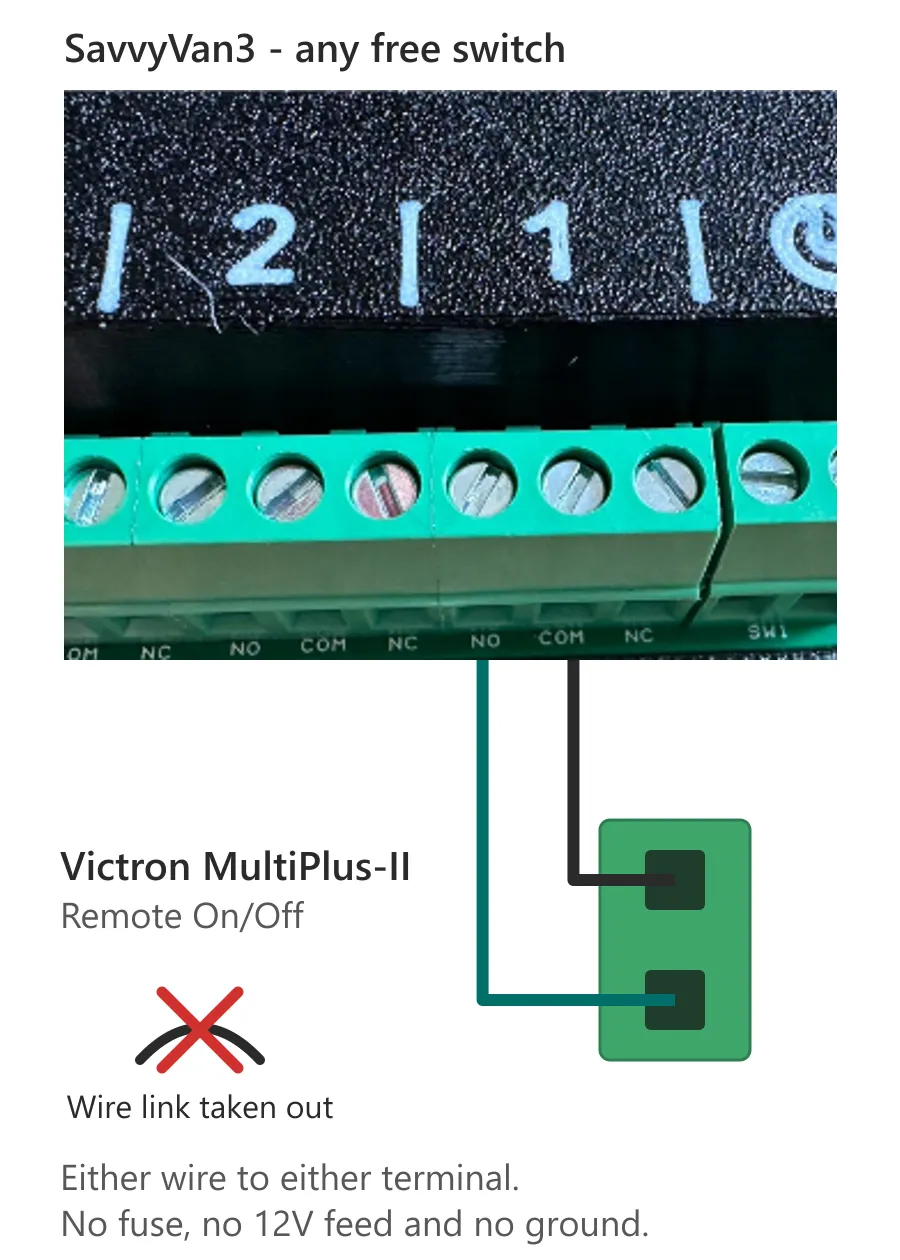
- Take out the wire link. Loosen the two Remote On/Off terminals and pull the short link out. Keep it somewhere safe: putting it back is how you go back to the MultiPlus-II running on its own switch.
- Connect your two wires to those two terminals. Either wire goes to either terminal - there is no polarity.
- Run them to the panel’s control board, to the switch you chose.
- Connect one to COM and the other to NO on that switch, either way round. Nothing else goes on them - not the fused feed a light would have.
- Refit the cover, reconnect the battery and the mains, and set the MultiPlus-II’s own switch to I (on). The remote input only works with it there. At O the MultiPlus-II stays off whatever the panel does, and at II it is charger only.
No fuse, no 12V feed into COM, and no ground - just the two wires.
Setting up the tile
The tile with the same number as the switch you wired is the one that turns it on and off. Here it is tile 1.
- Tap the menu top-left, then Installer Settings, and enter the passcode.
- Open Tile Settings.
- Check No. of Tiles is high enough to include your switch, then tap its number under Select a Tile.
- Tap the icon box on the right to open the full set of icons. Use the arrow to go to the second page, and tap Victron.
- Leave Advanced Options on None.
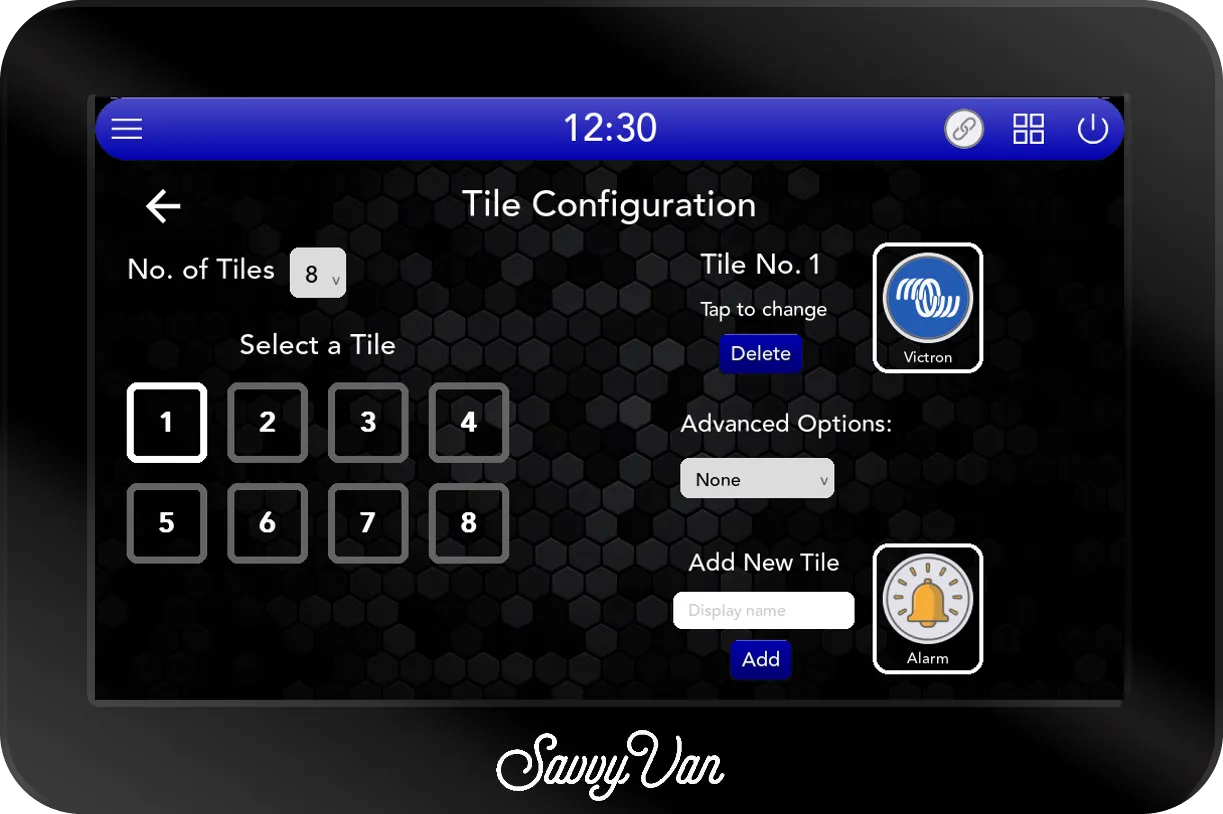
Picking the Victron icon names the tile Victron as well. There is also an ordinary Inverter icon in the set, if you would rather have that.
If you would rather it said Inverter
The name comes with the icon, so to have the Victron logo over the word Inverter, make your own tile first:
- Under Add New Tile, tap its icon box and pick Victron.
- Tap Display name, type Inverter, and tap Add.
- Tap your switch’s number, tap the icon box on the right, and pick your new Inverter - it is at the end of the set, after the panel’s own icons.
Using it
Tap the tile. Blue is on: the MultiPlus-II is running. Grey is off.

With SavvyVan Pro, the phone app switches it like any other tile.
A few things worth knowing:
- Off is the whole MultiPlus-II, the same as its own switch at O. The inverter stops, and so does the charger. On hook-up, a MultiPlus-II switched off neither charges the battery nor passes hook-up power through to the sockets it feeds. So leave the tile on while you are plugged in.
- After a power cut, it comes back off. The panel starts with every switch off, so if the panel loses power or restarts, the MultiPlus-II goes off with it. Tap the tile to turn it back on.
- The low voltage cut-off can turn it off. If it is set up to drop the switch you used, the MultiPlus-II goes off when the battery gets low. The installation guide explains the choices.
If you would rather it came back on by itself
Wire the second wire to NC instead of NO, and set the tile’s Advanced Options to Invert. The MultiPlus-II is then on unless the panel is holding it off, so it comes back on after a power cut - and Invert keeps the tile showing what is really happening.
Troubleshooting
If the tile does nothing
- Is the MultiPlus-II’s own switch at I? At O or II the remote input is ignored.
- Are the wires on COM and NO of the switch with the same number as the tile? Tile 1 is switch 1, and so on.
- Is the Remote On/Off plug pushed fully home, and are both wires tight at each end?
- Is Advanced Options on None? A Momentary tile lets go as soon as you lift your finger.
If the MultiPlus-II stays on with the tile off
- Is the wire link still in? It holds the MultiPlus-II on whatever the panel does.
- Is a wire on NC rather than NO?
- Are the two wires touching each other anywhere along the run?
If it turns off by itself
- Has the panel restarted or lost power? It comes back with every switch off.
- Did the low voltage cut-off act? The panel leaves a message in its notifications when it does.
- Is the MultiPlus-II protecting itself? Its own overload, low battery or temperature lights say so, and Victron’s manual explains each one.
Still stuck? Tell us what you are seeing, with a photograph of both ends of the wiring if you can.
Questions people ask
- Do I need a relay or a fuse?
- No. The switch does not power anything here. It only joins the two Remote On/Off terminals together, which is exactly what the wire link did, so no real current flows through it.
- Can the panel show what the inverter is doing?
- No. It switches the MultiPlus-II on and off and reads nothing back, so there are no watts, charge state or faults on the screen. The MultiPlus-II's own lights still show what it is doing.
- What happens after a power cut?
- The panel starts with every switch off, so the MultiPlus-II starts off too and you tap the tile to turn it back on. If you would rather it came back on by itself, there is a way to wire that, further down this guide.
- Can I choose charger only from the panel?
- No, this is on or off only. Charger only is still there on the MultiPlus-II's own switch.
- I have an older MultiPlus, without the -II. Does this work?
- Not as written. Older MultiPlus models can have a three-way remote terminal rather than this two-way plug, and it works differently. Ask us before you wire one.