
Installation guide
Fitting SavvyShunt
A shunt sits between your battery negative and everything else, and counts every amp through it. Fitting one is a 12V feed and one heavy cable moved - but that cable has to be the right one, which is what this guide is for.
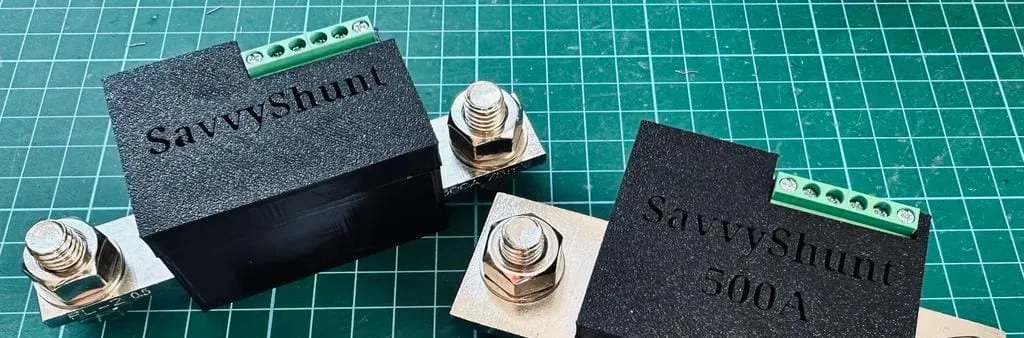
At a glance
- Sizes
- 300A or 500A
- Batteries
- AGM, lead acid and lithium
- Systems
- 12V and 24V
- Sampling
- Four times a second
- Pairs as
- SavvyShunt - BK-Batmon on a SavvyVan Lite v2.1
- Working voltage
- 7–30V, drawing 0.005A at 12V
Before you start
Check which model you have and that the panel is on the latest software. Update instructions are in the SavvyVan3 user guide.
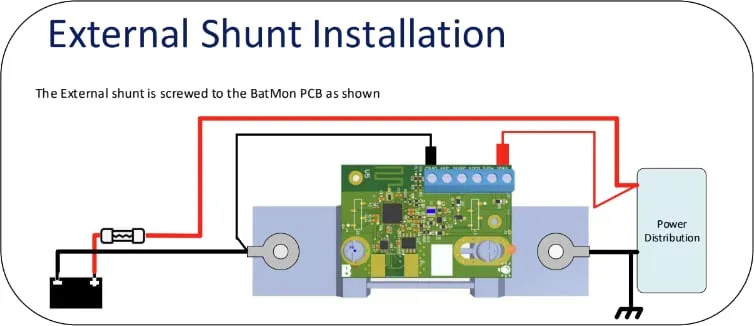
Then work out where the shunt goes before you disconnect anything. It sits at the battery, and every negative in the van has to end up on the far side of it.
The shunt is a serviceable part. It must be fitted where it can be reached, disconnected and removed without dismantling fixed furniture or bonded panels - for example in a battery locker, under a seat, or behind a removable access panel.
Wiring it in
It needs two things: a 12V or 24V supply, and to sit inline on the battery negative.
What the light is telling you
The shunt has one red light. Check it before you go near the panel.
| The light | What it means |
|---|---|
| Red, flashing quickly | Powered and working. Go ahead and pair it |
| Nothing at all | No power reaching it, or a fault - see troubleshooting |
Pairing it
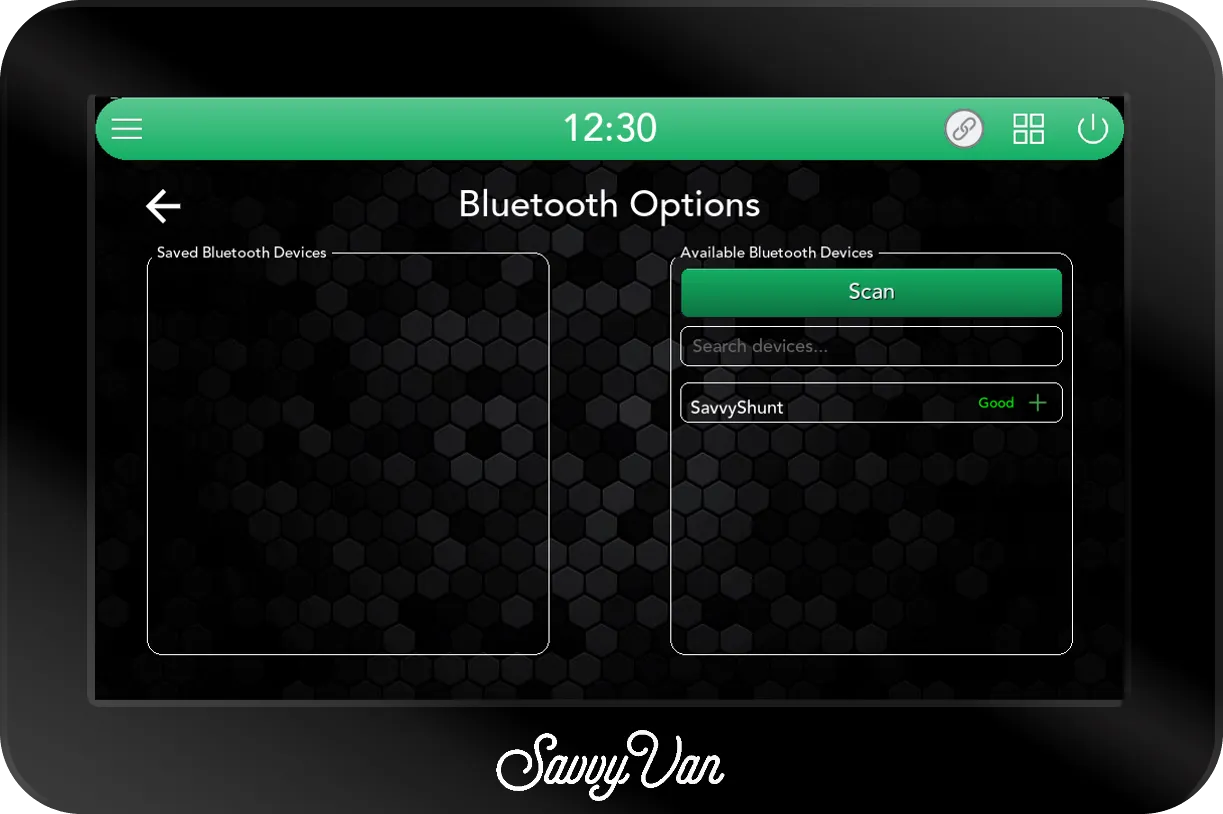
- On the panel, open Installer Settings, enter the passcode, and go to the device pairing screen - the one with Scan on the right.
- Look for
SavvyShuntin the right-hand list. The panel listens all the time, so it usually appears on its own once the page is open, with a signal reading beside it. If it does not, tap Scan. - Tap the green + next to
SavvyShunt. That is it.
Once it connects, the symbol beside it turns blue and it moves to the saved list. Its cog goes straight to the battery settings.
Setting your capacity
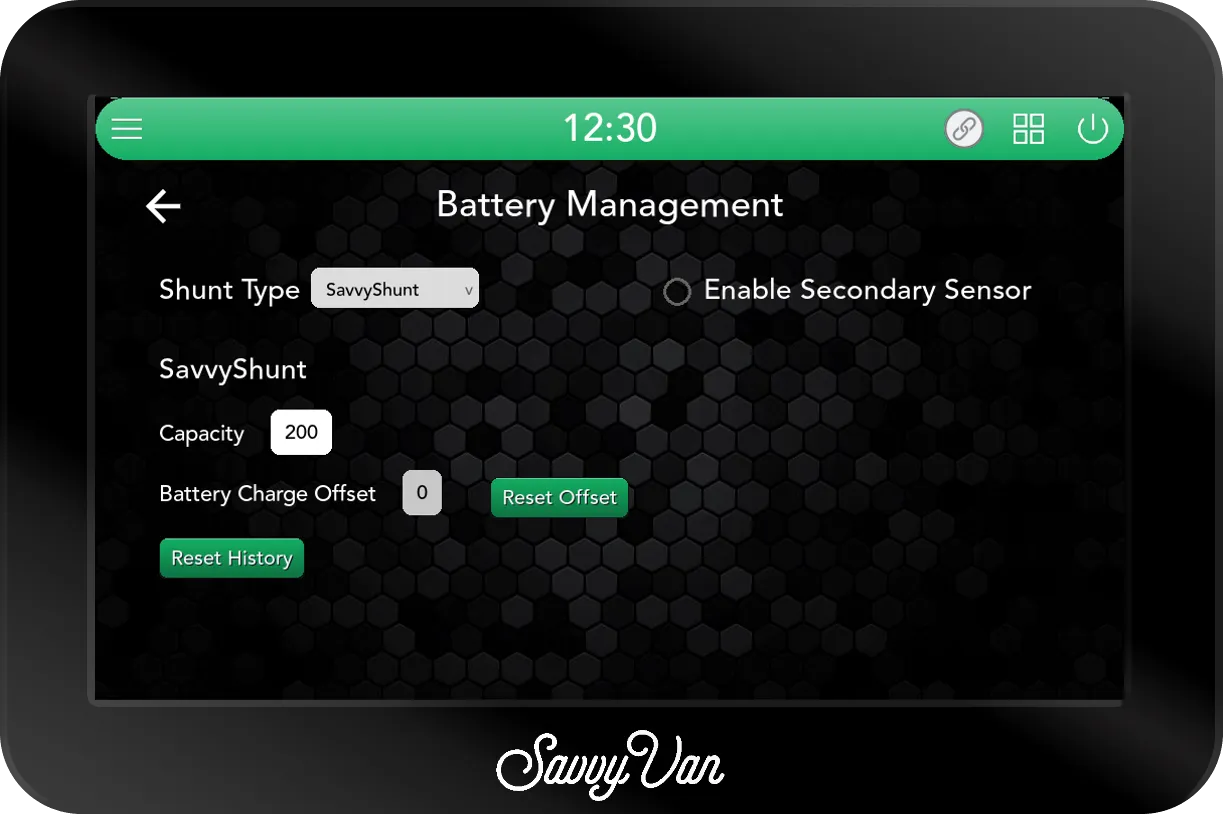
Tap the cog beside the saved device, or go to Settings → Battery Settings. Pairing sets Shunt Type to SavvyShunt for you, so check it reads that, then set the capacity.
Enter usable capacity, not the number on the battery. Batteries do not like being emptied, and how far you can safely go depends on the chemistry:
| Battery | Enter this share of total capacity |
|---|---|
| Lithium | 80% |
| AGM | 60% |
| Lead acid | 50% |
Then tap Reset Offset. That sets the current reading to 100% full, and it adjusts from there as the battery charges. Do it again if you fit a new battery or move the shunt.
Using it
Your battery now sits on the main screen with its percentage, live current and the direction it is flowing. Tap it for the full page.
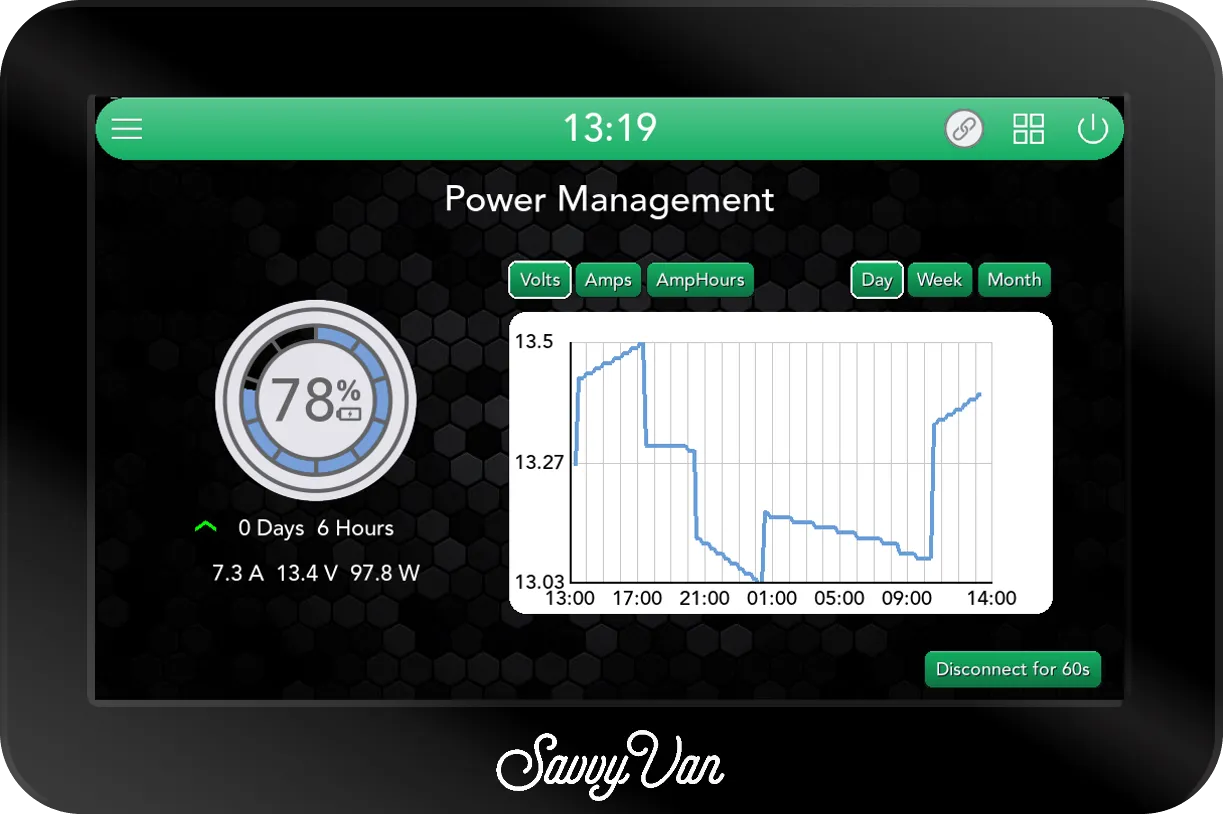
- Time to charge or discharge is based on what you are using right now, so it moves as things switch on and off.
- History covers amp usage and battery voltage by day, week or month - which is how you find the thing quietly draining your battery overnight. The panel keeps 30 days of it by default.
Troubleshooting
Not in the list when you scan? Check the shunt’s red light is flashing - no light means no supply, the usual culprit.
No light? Check the fuse and the feed first - a missing supply is the commonest reason a shunt never appears on the panel. If the feed is good and it still stays dark, tell us rather than working around it.
Specification
| Working voltage | 7–30V |
| Draw | 0.005A at 12V |
| Sampling | Four times a second |
| Batteries | AGM, lead acid, lithium |
| Systems | 12V and 24V |
Warranty
SavvyShunt carries our 12-month warranty. The free second year you get for registering is for the SavvyVan3 panel itself, so there is nothing to register for this one.
Questions people ask
- How much battery history does it keep?
- 30 days by default - amp usage and battery voltage, by day, week or month. Tap the battery on the main screen and it is on the page that opens.
- Which size do I need?
- Size by the largest current that will ever pass through it - that means your charger and your inverter, not your fridge. 300A suits most van builds; 500A is for large inverters.
- Can I fit two shunts?
- No. A van uses one source of battery data: one shunt, or one battery that reports itself. The old products page claimed up to three; that was wrong.
- Why does my percentage look wrong at first?
- It calibrates as the battery charges. Reset the offset with the battery full and it settles.