
Installation guide
Installing SavvyVan Lite v2.1
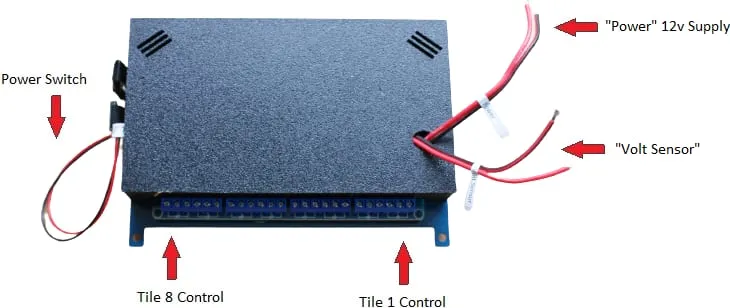
SavvyVan Lite v2.1 - sometimes called SavvyVan2 - is one all-in-one unit that recesses into a wall, rather than the separate screen and board of SavvyVan3. It is no longer sold, but this guide stays here for anyone fitting or refitting one.

At a glance
- One unit
- Screen and switching in the same box
- Cut-out
- Up to 105 × 180 mm, with 40 mm clearance behind
- Surround
- 130 × 195 × 9 mm, front mounting only
- Switching
- 8 circuits, negative switching, K1–K8 = tiles 1–8
- Power
- 3A fused live feed, plus a 2A fused sense feed to the battery
- Status
- No longer sold or supported
Before you start
It must be installed by a suitably qualified person, such as an auto electrician. Test the unit on a 12V supply before fitting it, and if anything is wrong, get in touch before it goes into a wall.
Planning the cut-out
The unit recesses into a wall or a box, which is what gives it its slim profile.
- Cut-out: up to 105 mm high × 180 mm wide.
- Depth behind: at least 40 mm, for cables and ventilation.
- Supplied surround: 130 × 195 × 9 mm - front mounting only. Rear mounting gives a slimmer look but you will need to make your own surround.
Choose somewhere cables can reach both the battery and the appliances you are switching. WiFi is needed for the clock, the weather and updates.
Connecting appliances
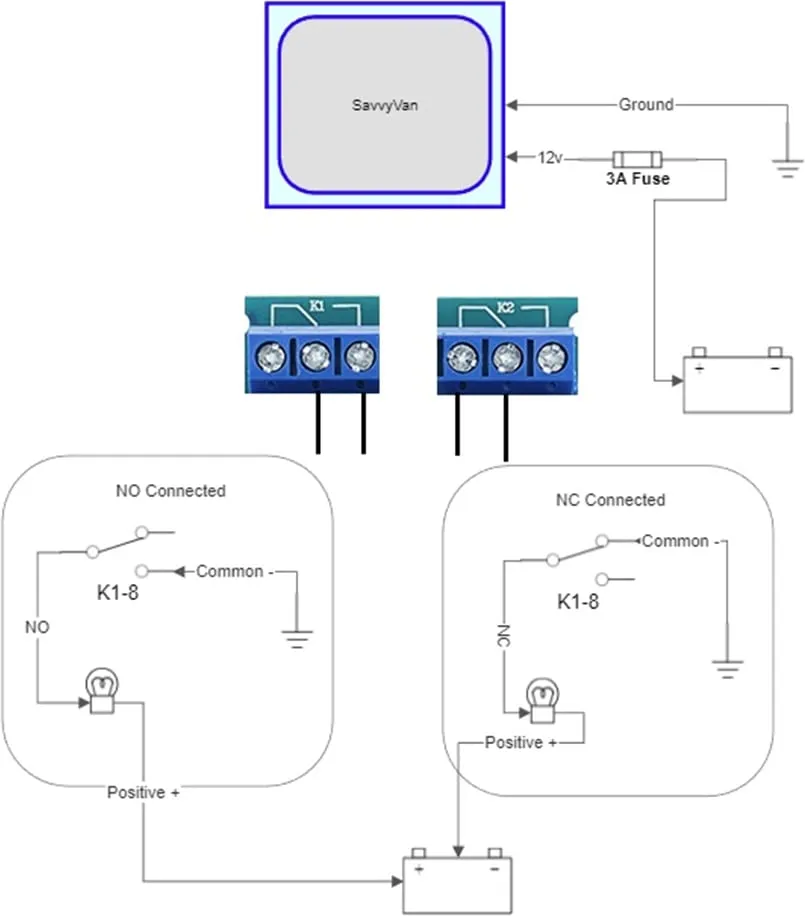
SavvyVan Lite does negative switching. Each appliance takes its live feed from your 12V supply through a fuse box, and its negative returns to the ground bus bar via the panel.
The labels K1 to K8 on the interface correspond to the tiles on screen: K1 is tile 1, K2 is tile 2, and so on. Note what you connect where - you will need it when configuring the tiles.
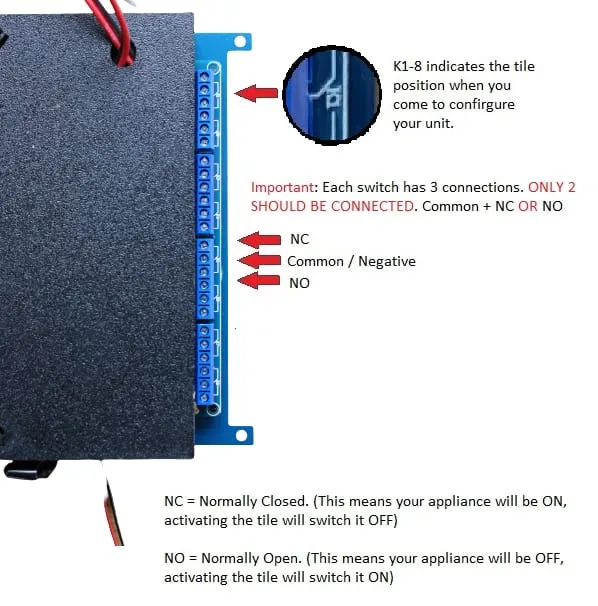
Over 10A at 30V needs an external high-current relay, driven from one of the switches and wired per its own instructions.
Power
Two feeds, and they do different jobs:
- Power - the wires labelled Power go to a 3A fused 12V live feed.
- Voltage - the wires labelled Voltage go directly to the battery terminals through a 2A in-line fuse. That gives the most accurate battery reading, because it measures at the battery rather than after the losses.
The unit starts as soon as power is live, so leave the fuse out until every connection is made and the unit is secured.
First startup
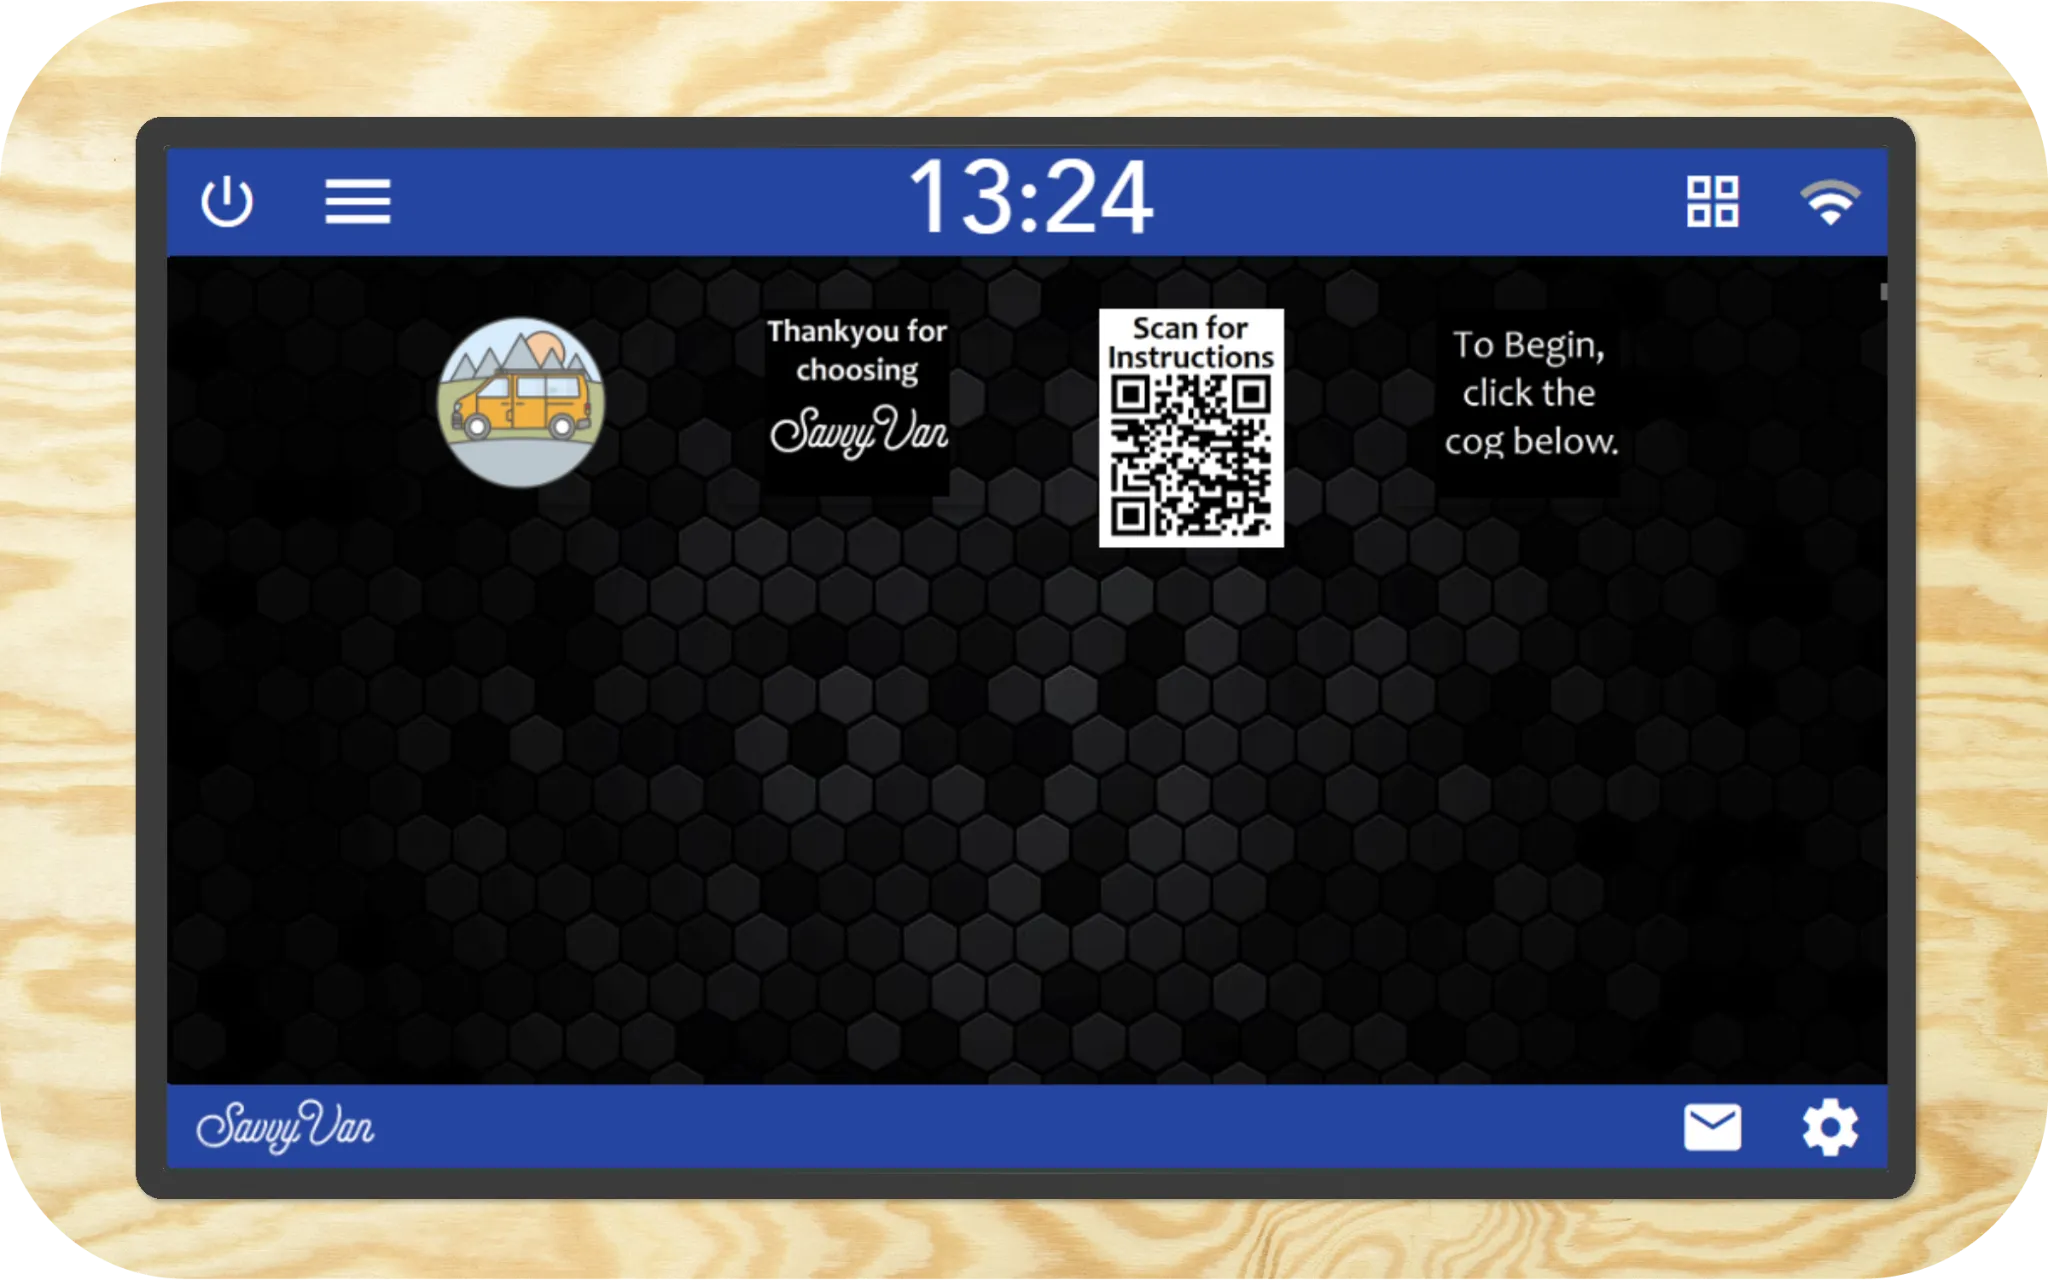
The unit starts as soon as the 12V supply is live. Allow up to 60 seconds to calibrate, then follow the on-screen instructions.
WiFi
The unit has 2.4GHz WiFi, needed for the clock, weather and updates. Tap the WiFi icon top-right.
- Under Available networks, tap Scan.
- Tap the green + next to your network.
- Enter the password and tap OK.
Updating
Update before configuring, because an update can reset your settings.
Depending on your software version, either:
- Tap the Menu top-left, then Update; or
- Tap Settings, enter the passcode, choose System Information, then Update Now.
- The latest software for this unit is 2.1.6.
Updates are not automatic on Lite - you have to start them.
Configuring your tiles
Tap the cog, bottom right, and enter the passcode - 123456 by default, unless an installer set their own.
Choose Configure Tiles, then how many you have, then set each one. Pick an icon from the list, or type a name and choose an icon to make your own. To remove one you made, select it and tap Delete.
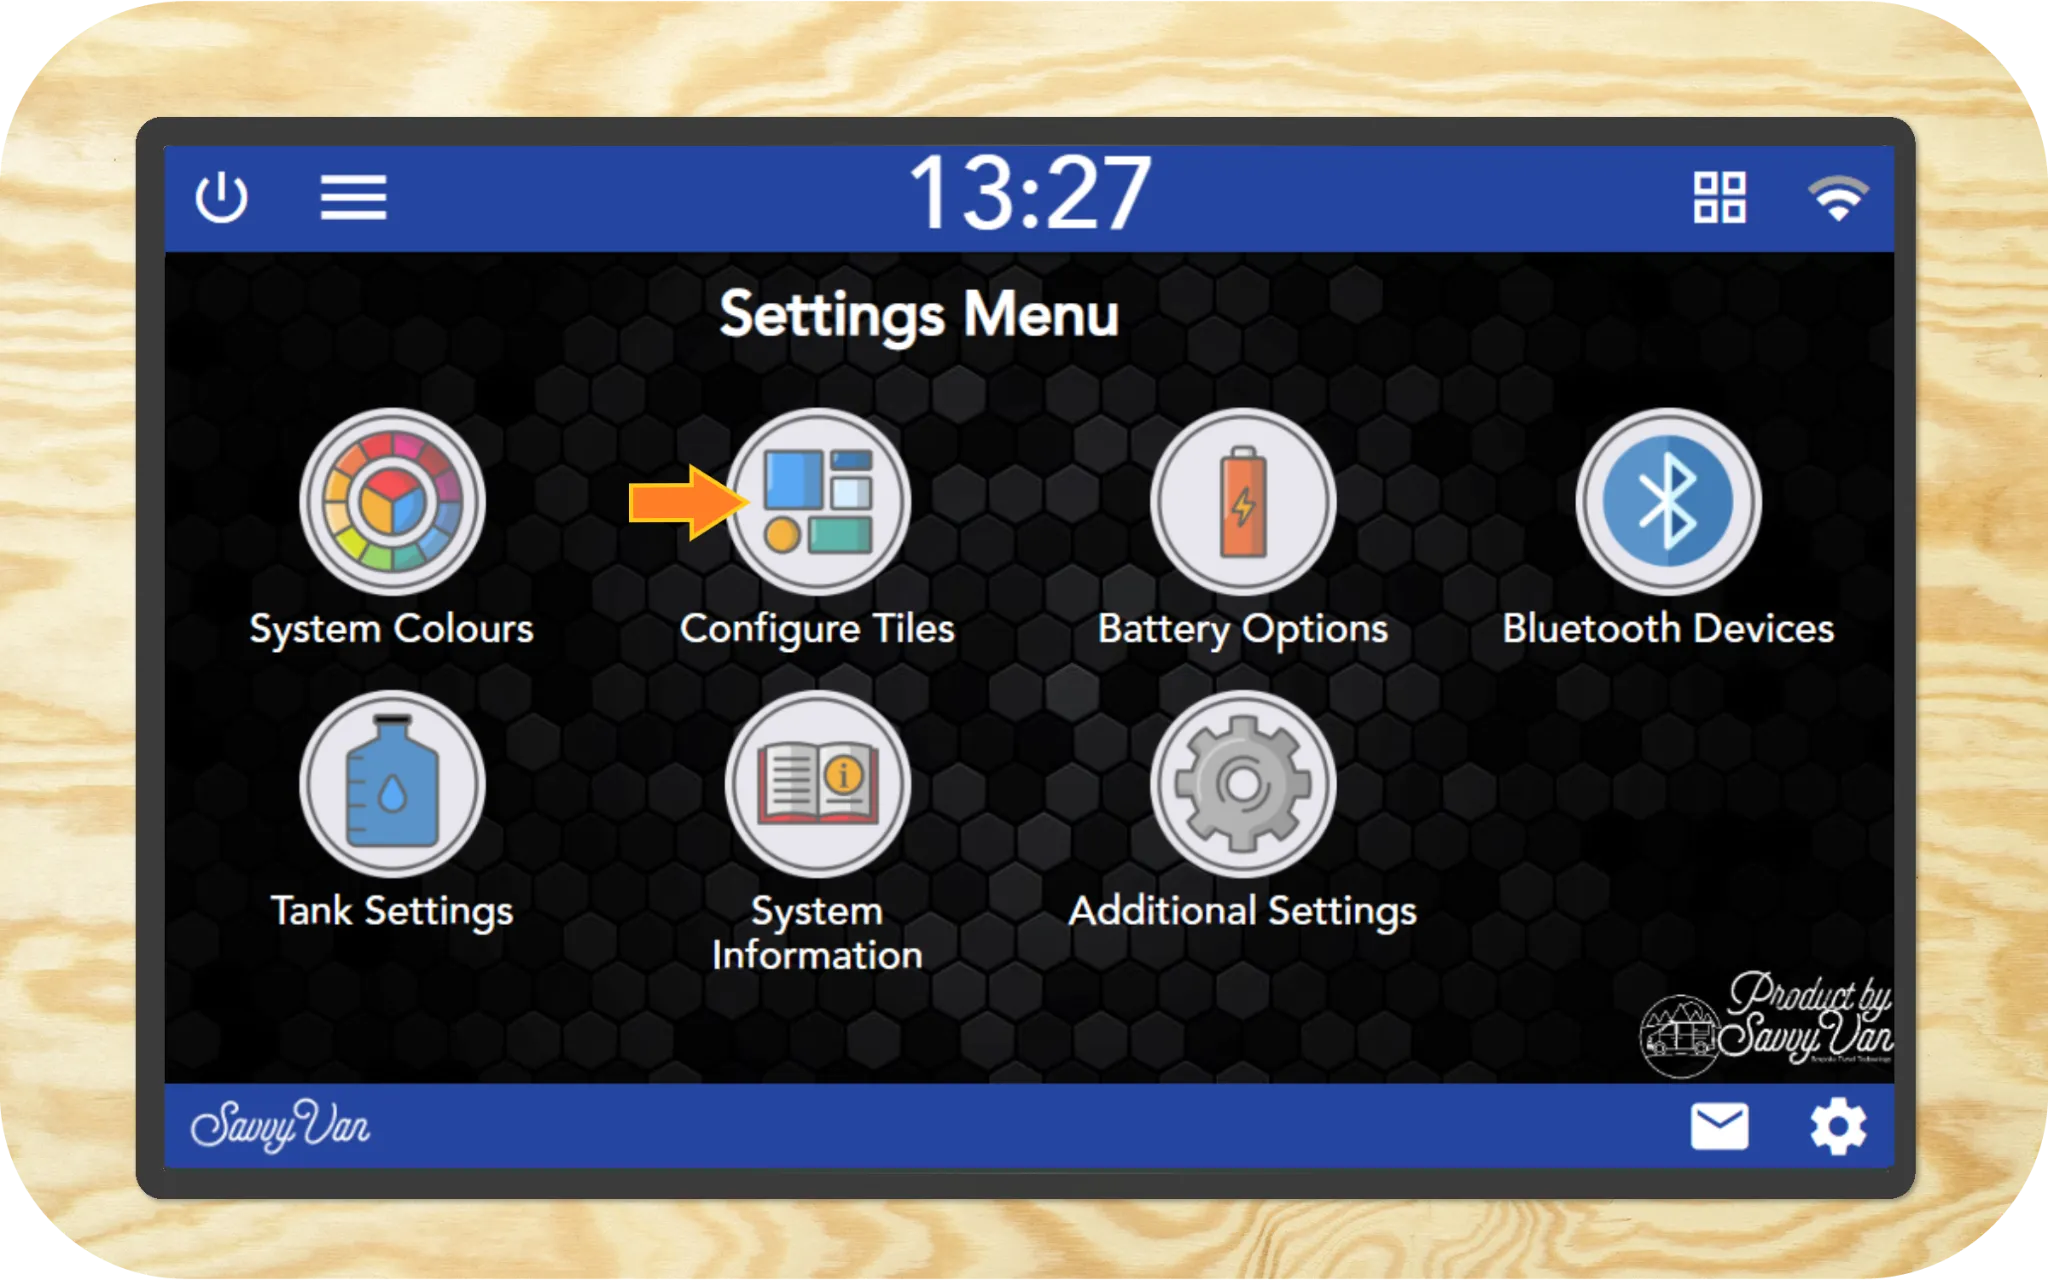
Colours live under Settings → System colours.
Troubleshooting
Moving on from Lite
SavvyVan3 is the current panel: different hardware throughout, a separate screen and control board so the screen goes where you want it, positive or negative switching, and the add-ons that came later. If your Lite has reached the end of its life, that is what replaces it.
Questions people ask
- Is SavvyVan Lite the same as SavvyVan2?
- Yes - same product, two names. The guides say SavvyVan Lite v2.1, and the URL keeps savvyvan2 so older links and bookmarks still work.
- Will the newer add-ons work with it?
- No. SavvyTanks V3, SavvyLights and SavvyStance v2 all need a SavvyVan3 panel. It is a generation gap, not a fault or a setting.
- Can I still get support?
- The product is no longer supported, but we would still rather hear from you than not. Get in touch and we will help where we can.